How to add a custom mail server to Apple Mail
How to add a custom mail server to Apple Mail: Step-by-Step and video
What is a custom domain?
For a personal email account, most people will use a server like iCloud, Gmail or Yahoo. But for a business, this can look unprofessional.
This is why custom mail servers exist!
Having a custom mail server allows you to have a custom email address, such as name@mediachimps.com
It looks the part and gives brand visibility and credibility - you want your business name to get out there as much as possible.
How to add your custom mail server to Apple Mail (or scroll to the end for the video)
When you search ‘how to add a custom domain to Apple Mail’, most results explain how to add the domain to the Apple server, which requires an Apple+ subscription.
However, you can add the custom server to your mailbox rather than completely transfer.
This doesn’t require Apple+ and is free because of this.
So, let’s add your custom email to Apple Mail.
The first step is to head to settings, or system preferences if you are on an iMac.
For iPhone, scroll through your settings until you get to Mail.
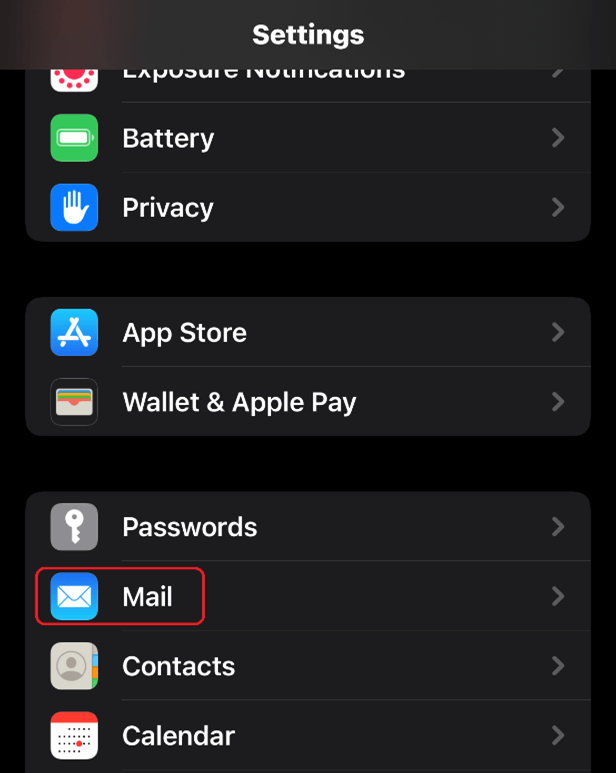
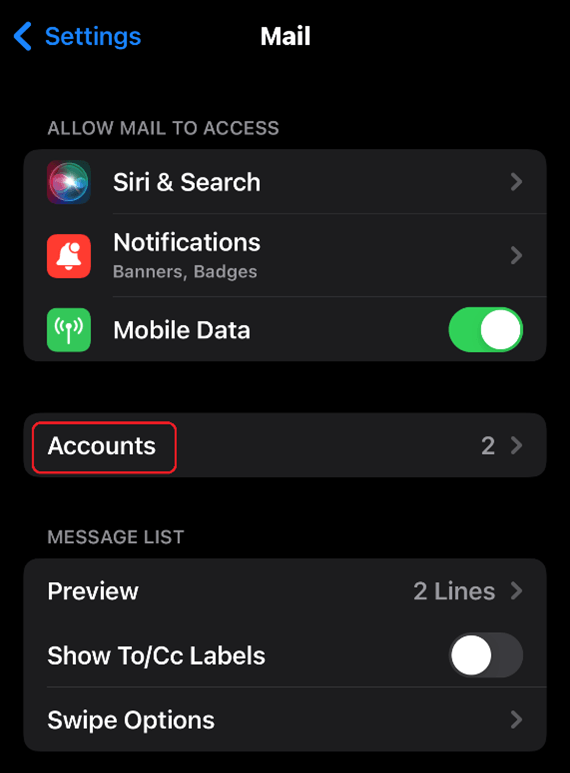
Now select Accounts.
If you're on an iMac, go to Internet Accounts.
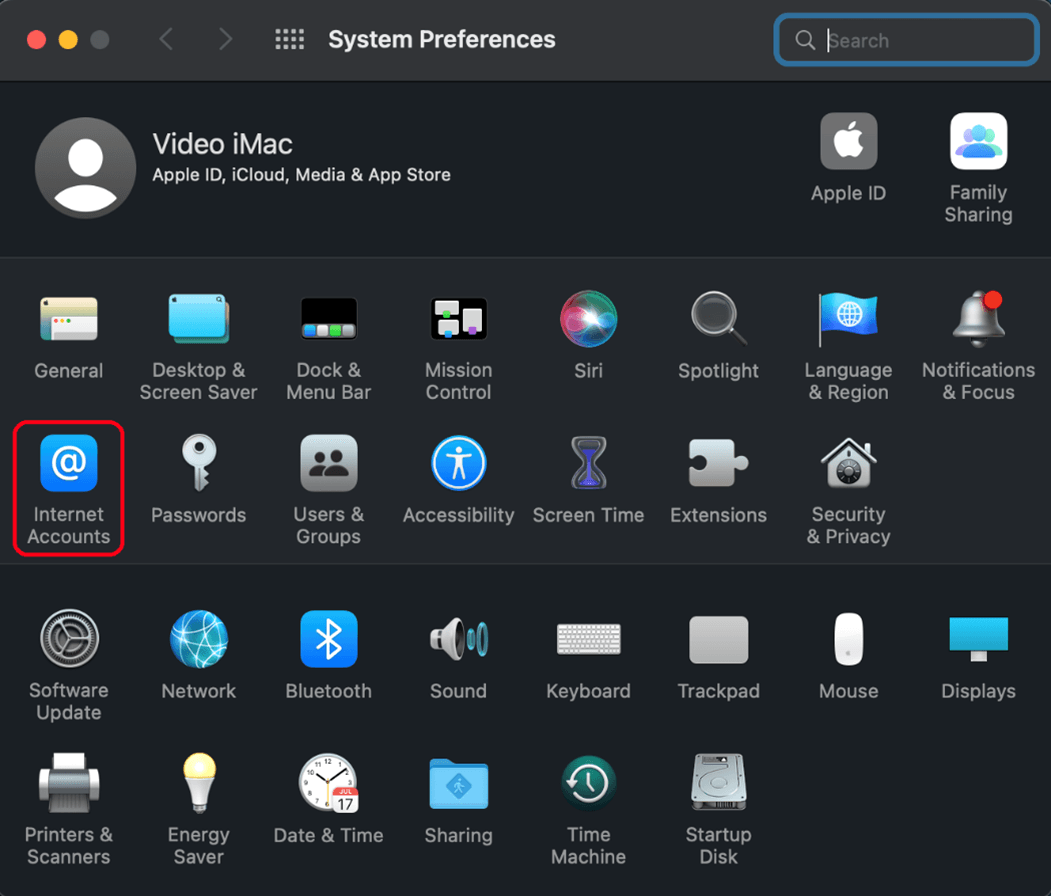
From there, click Add Account. At this point in the process, it’s the same for both iPhone and iMac.
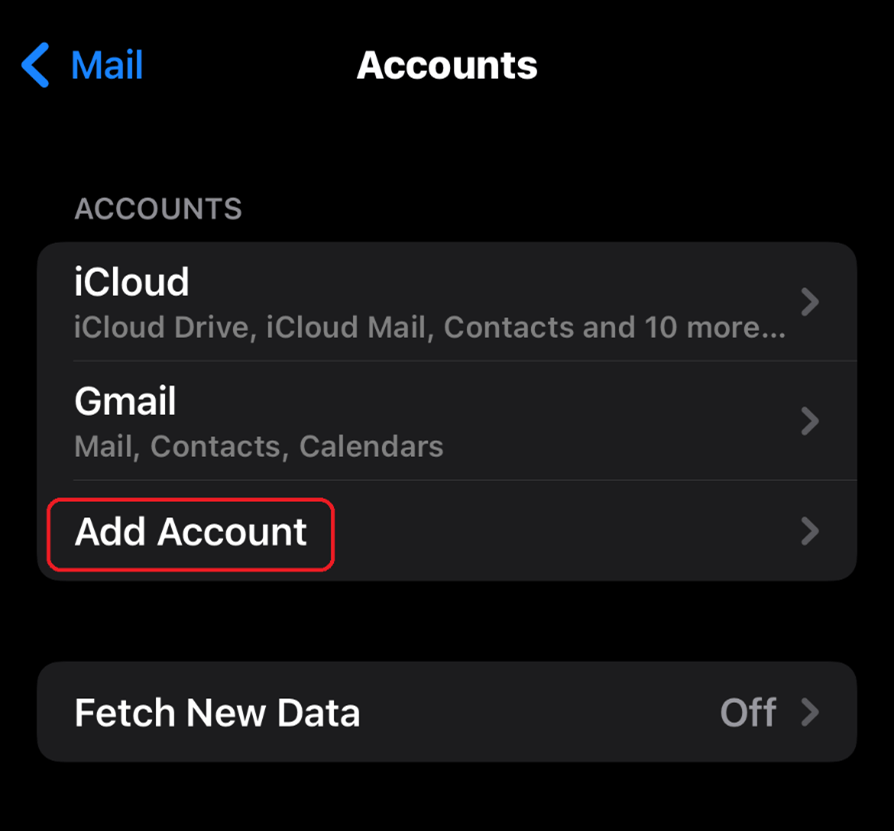
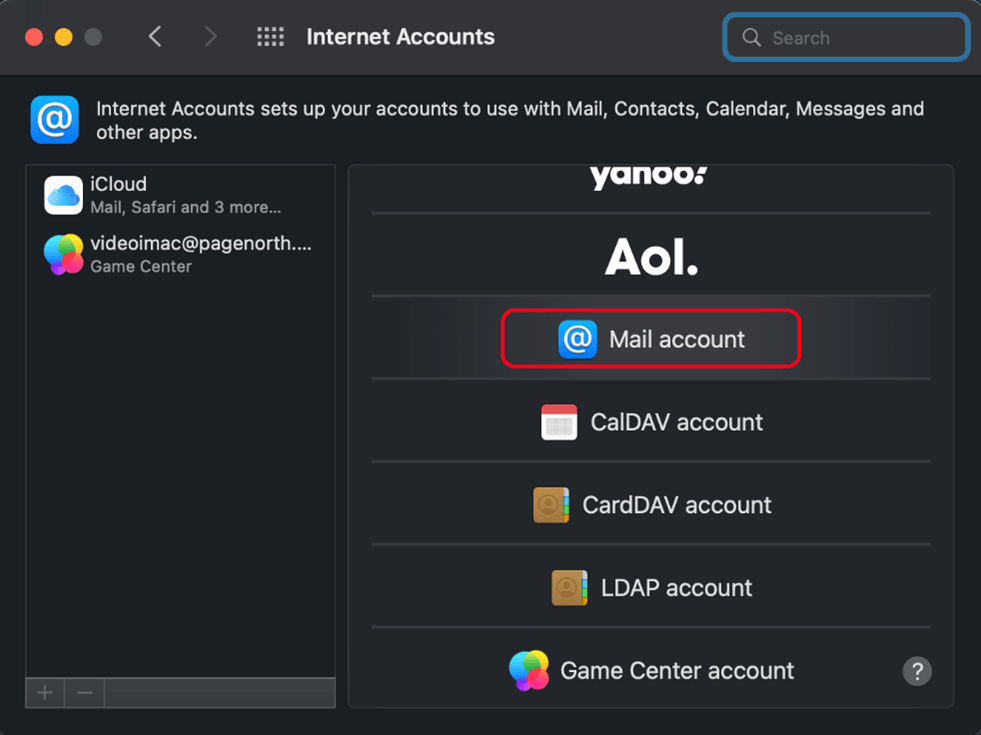
Once you have clicked Add Account, there are several account types you can choose at this point.
We are looking for Mail account, so click on that.
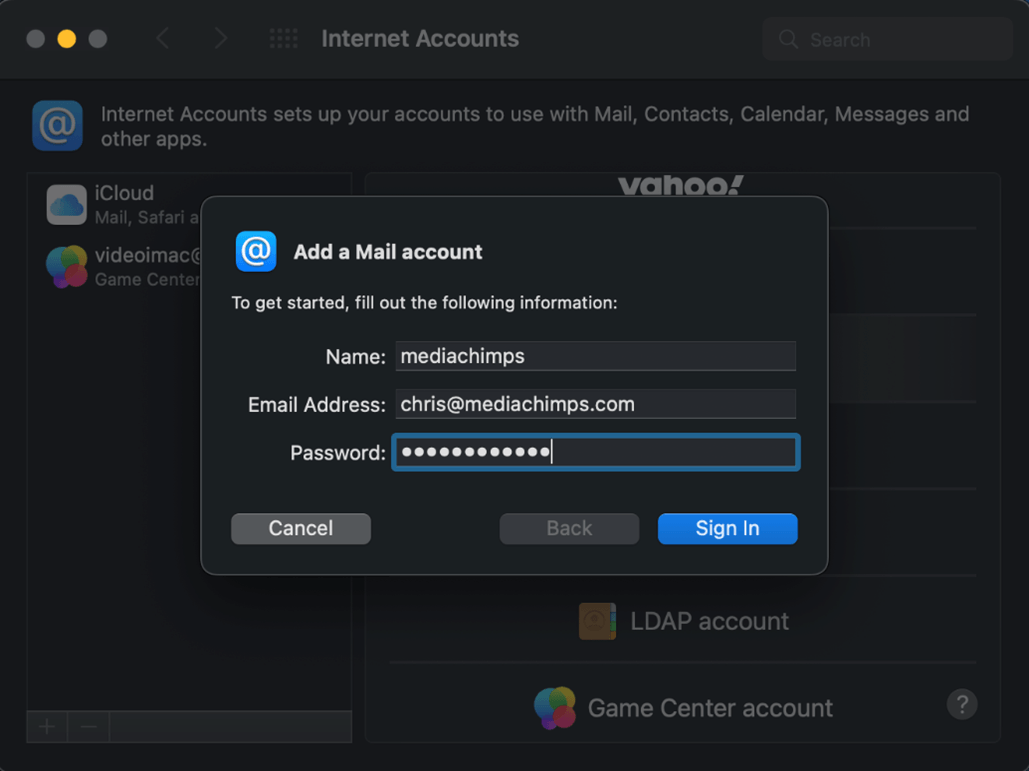
Firstly, you want to add a name to the Mail account, this is what the mailbox will show as in your Apple Mail, so we’ve simply put it as ‘mediachimps’.
Then it’s just the email address and password that needs to be entered.
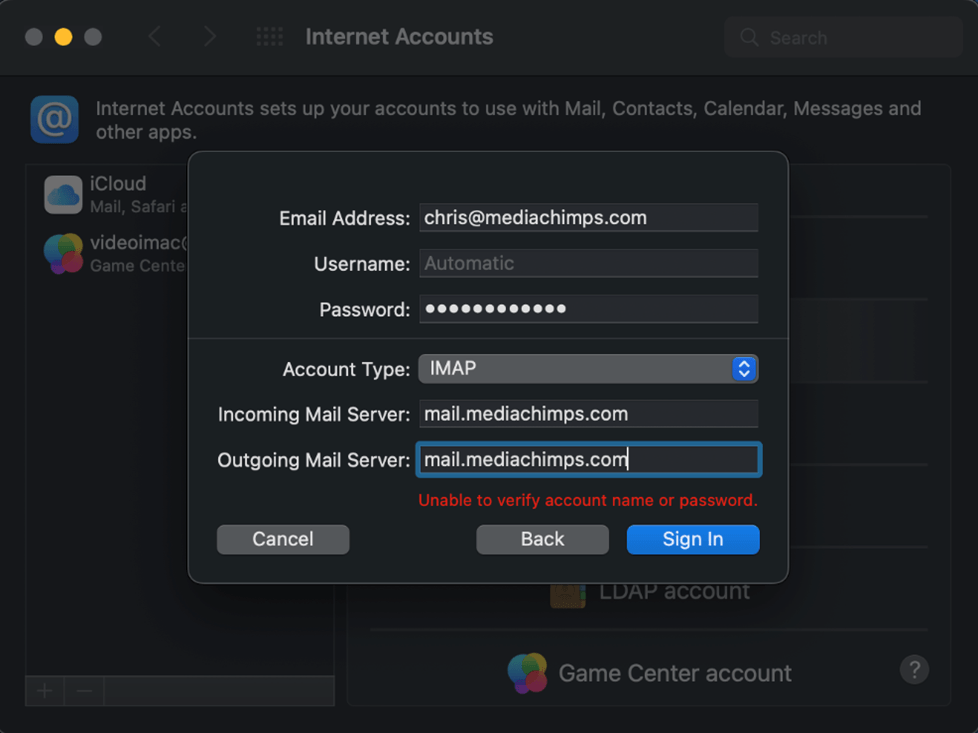
In most cases, you will get this pop-up.
It may seem worrying due to the red text, but it’s normal. Chances are that you haven’t entered any incorrect details, it simply means it can’t grab enough information from the log in details alone.
All details for this will have been provided to you by your domain provider, the details are needed to give Apple Mail access to your domain.
As long as the information is correct, you will be able to sign in fully.
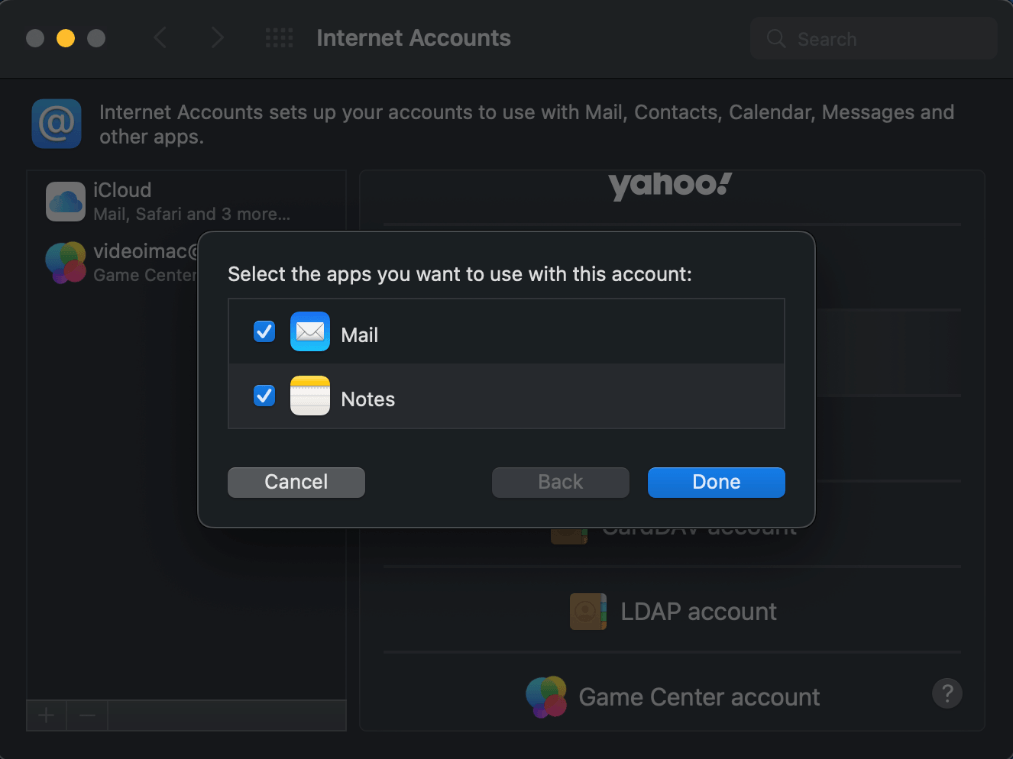
You choose which applications can get access to this account, so make sure Mail is ticked, so your mailbox will be successfully added.
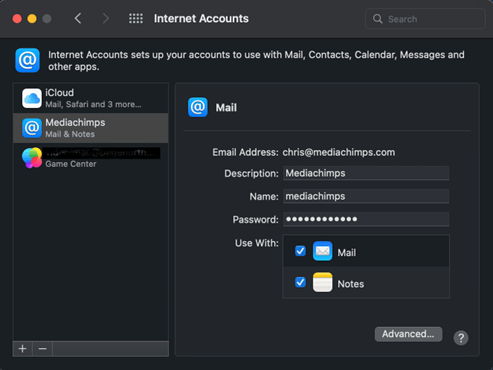
Now, you can see your account is added, it lists the applications it uses and has all basic information.
The plus sign on the bottom left allows you to add another account, the minus lets you remove an account.
When you check your mail app, the original iCloud mail account will still show alongside the added mail account.
Both will have separate inboxes, but can be viewed as one with the All inboxes option.
Easy enough, right?
Having all of your email accounts stored in one place means you can view your personal and work emails easily, while also allowing to keep them separate and organised.


